Send & Receive Email in Podio
Sending directly from Podio
- Use the Compose New Message link in the activity or the field added to the App Template
This field is added at connection, to remove, go to Reply Links in 🎯Configuration Settings.
 ❗If clicking this link returns Invalid Code 58 - this means the field address does not match the app address. Typically this happens if the App was cloned from another GlobiMail connected App. To fix it, simply uncheck the option in the settings to remove it and then re-add to get the correct address associated.
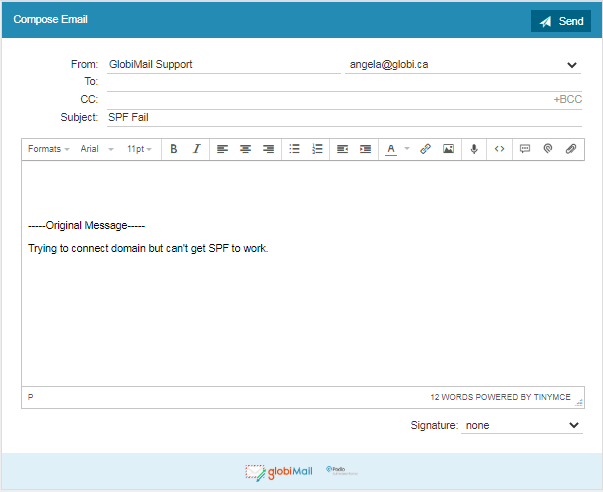
This opens the Composer Browser. Works on desktop and the mobile browser.

Composer Toolbar Explained...
From: The From Name and Email Address are pulled from the sending users Podio details.
- From Name can be changed manually at any time.
- From Address allows you to select other email addresses verified on your Podio User.📌The sending address will be remembered by default for future emails from this App.
To & CC: The first contact mapped will be set in the To: line, additional addresses will be in the CC:
- Addresses are brought in from the mapped location. If no location is set, enter the name and email address of the recipient.
- Suggested contact emails from the Podio Item will be available for choosing. Select +BCC to send a blind copy of the email to another recipient.
Subject: Can be set to use a single-line text field or a calculation field from the Podio Item.
- Map this field for default use from the Reply Links under the App Settings in 🎯Configuration Settings
---Original Message---: Can set to use a multi-line text field from the Podio Item.
- Set this field from the Reply Links settings to set the field for the initial incoming message.
Message Body: The Formatting Toolbar allows some of the most common options for formatting
- Select font, change the colors, as well as add images, hyperlinks, and more. Hover over the icon to get a small text description.

Special Use Icons:
- 📚Boilerplates can be created for use when sending standard-type emails.

- 🖱️Insert Podio Fields to easily use data from the Items fields and the attached files.
Files must be attached to the Podio Item from your computer, not a File Service.

Attach Files:
Sending GlobiMail Campaigns
- Create a Podio View
- Create a Commercial Template under 📚Email Templates
- Send the template from the 📨Campaign Manager
Send Workflow Automated Emails
- Create a Template under 📚Email Templates
- Create a GlobiFlow in 🔁Podio Workflow Automation
The Sent Email
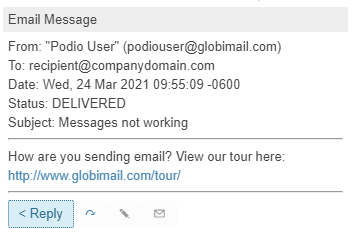
The email is Sent to the Contact and will appear as a Comment on the Podio Item. This Comment is cleansed of HTML and signatures.

Advanced options for the Apps' Email Comments are in 🎯Configuration Settings This includes the view of the Header and how Attachments are handled.
When the email is received by the recipient, the email will show From: your name however the address will be a mapped address for routing purposes. See 🗺️Email Address Mapping for more information on how this works.
Receiving Replies
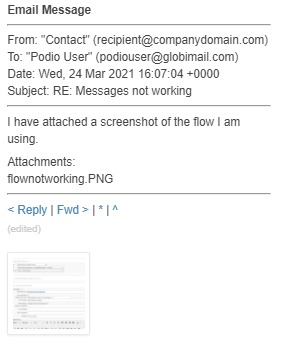
When the Contact sends back a Reply, another Comment is made on the Podio Item. The 🗺️Email Address Mapping is set by default.
Default settings cleanse the comment of history and signatures. Change this in the App Settings per 🎯Configuration Settings
Files attached to the Email will be included in the Comment by default. Settings to turn off Comment Attachments and Add the File to the Item are also available.

Keep the conversation going...
Click the Reply Link at the bottom of the comment.
- Use ✏️Moderate Comments to open the comment in GlobiMail.
This allows an Admin User to edit and troubleshoot the Email Comment.

- Use 📨Email Archive to go directly to the archive item.
Keeps your Inbox clean and backs up emails for reference.


